Yes, you can run a Valheim dedicated server on your own PC, and it costs nothing. You install SteamCMD, download the server, edit one line in a start script, and decide how your friends will reach it. This walkthrough is written for Valheim 1.0 (patch 1.0.17), which matters most when you get to backups, because the save format changed.
Yes, you can host Valheim on your own PC for free
If you've been hosting from inside the game, you already know the problem. That creates a p2p session, and the world goes away the moment you log off. A dedicated server keeps the world up so your friends can play whenever they like, whether you're on or not.
The Valheim Dedicated Server is a separate free tool on Steam, with app ID 896660. SteamCMD downloads it with an anonymous login, so the hosting PC doesn't need a Steam account that owns the game. That's handy if you're using a spare machine in the corner.
The job has three parts:
- Install SteamCMD and pull the server files.
- Edit one line in a copy of the start script.
- Either forward ports 2456-2457 on your router, or add
-crossplayand skip the router.
To keep things concrete, the examples below all build one made-up server called Frostheim.
Installing SteamCMD and downloading the server
SteamCMD is the command-line version of the Steam client, and installing and updating dedicated servers is its main job. There's no installer, just a zip.
- Download the zip by pasting this address into your browser:
https://client-update.steamstatic.com/installer/steamcmd.zip
- Create a folder such as
C:\steamcmdand extract the zip into it. - Open a Command Prompt and start SteamCMD:
cd C:\steamcmd
steamcmd
- The first run takes a moment while SteamCMD updates itself. When it's done, you'll see a
Steam>prompt. - Tell it where the server should go. Do this before you log in, and give the server its own folder:
force_install_dir C:\valheimserver
- Log in anonymously:
login anonymous
- Download the server:
app_update 896660 validate
- When the download finishes, leave properly so SteamCMD logs off the Steam servers:
quit
You now have a C:\valheimserver folder with everything in it.
If you'd rather not touch a command line at all, the same tool is in your Steam Library under Tools as Valheim Dedicated Server.
If you're on Linux
Don't run SteamCMD as root. Create a user named steam for it first:
sudo useradd -m steam
sudo passwd steam
On Ubuntu, install SteamCMD from the package:
sudo add-apt-repository multiverse; sudo dpkg --add-architecture i386; sudo apt update
sudo apt install steamcmd
Switch to the new user with sudo -u steam -s, then start SteamCMD with steamcmd and use the same four commands as on Windows, with forward slashes in the path. A package install throws an error if you give . as the directory, so use an absolute path such as /home/steam/valheimserver.
The server also needs the packages libatomic1, libpulse-dev and libpulse0. The start script is start_server.sh, and you launch it from a terminal in the server folder with ./start_server.sh.
Setting up the Valheim dedicated server start script
Open C:\valheimserver and find start_headless_server.bat. Before you edit anything, make a copy of it and give the copy your own name, say start_frostheim.bat. The original file is reset every time the server updates, so any edits you make there will vanish after a patch. A copy with a different name is left alone.
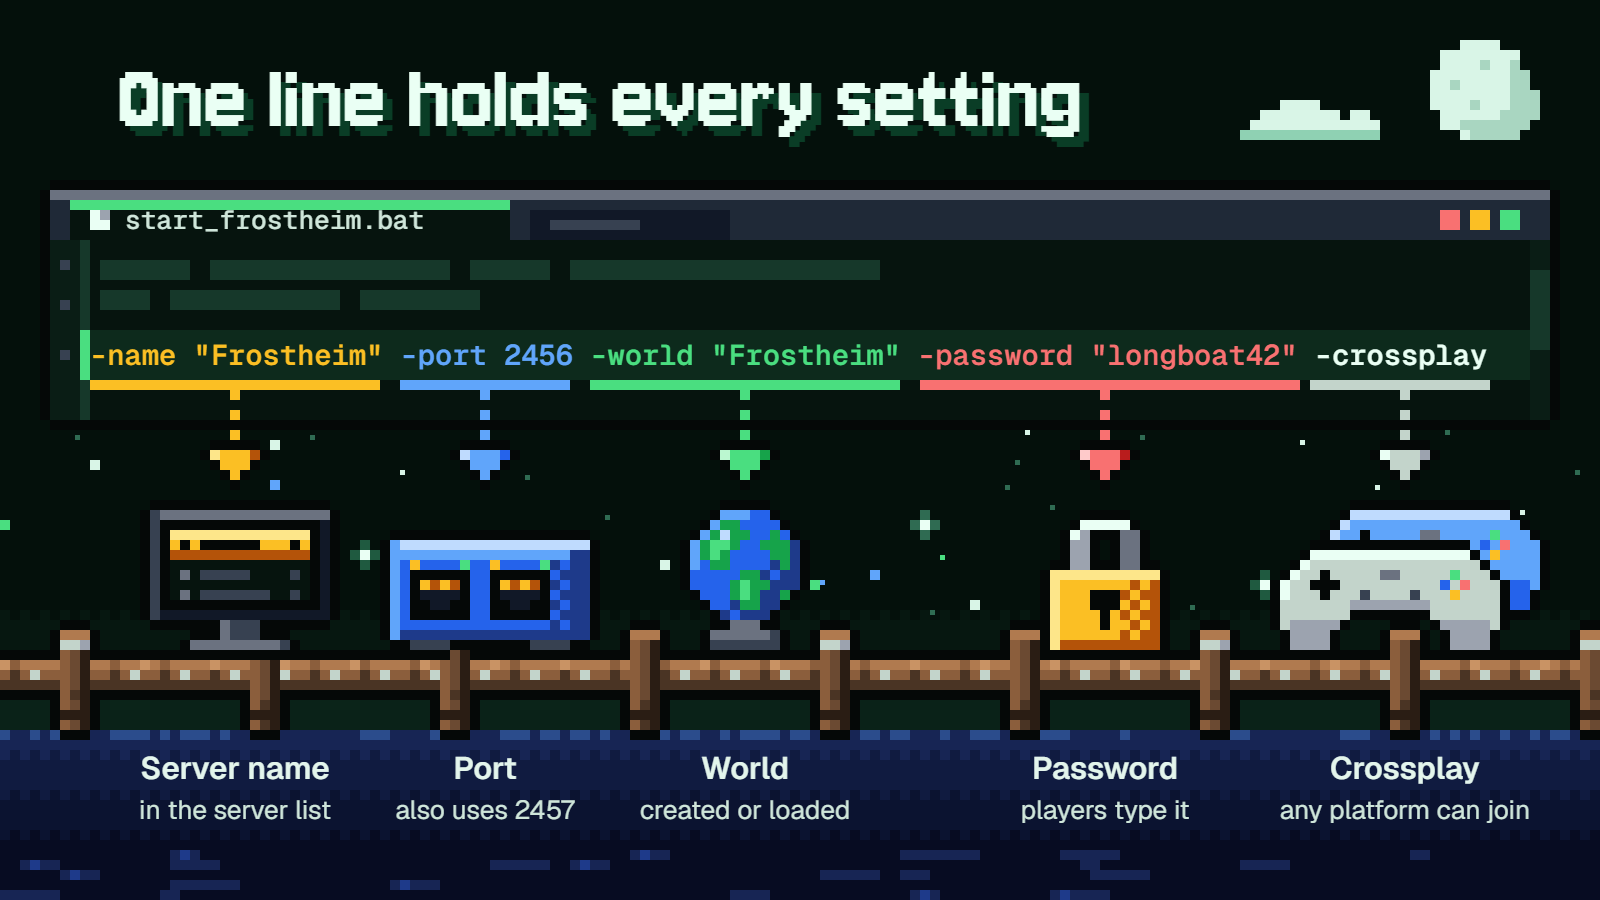
Right-click your copy and choose Edit to open it in Notepad. Every setting sits on one line, the one that launches valheim_server. Leave the rest of that line as it is and change only the parameters. For the Frostheim server, they'd look like this:
-name "Frostheim" -port 2456 -world "Frostheim" -password "longboat42" -crossplay
Here's what each one does:
-nameis what your friends see in the server list.-worldis the world's name. If no world with that name exists, the server creates one. If one does exist, it loads it.-portis the port the server listens on. It also uses the next one up, which is why the default is written as 2456-2457.-passwordis what players type to get in.-public 1is the default and lists the server in the server browser.-public 0hides it, and then the only way in is theJoin IPbutton.-crossplayswitches the server to the crossplay backend. More on that in the next section, because it changes how everyone connects.
There are optional extras too. -savedir moves the saves somewhere other than the default folder. -saveinterval and the backup flags (-backups, -backupshort, -backuplong) change how often the world saves and how many backups are kept. -preset, -modifier and -setkey set world modifiers from the script, so -preset hard gives you the Hard preset and -setkey nomap turns the map off. Iron Gate lists every value in its guide to dedicated servers.
Save the file and double-click it. If a Windows Firewall popup appears, tick all the checkboxes. Then watch the window: the server is ready when it prints Game server connected.
One small trade-off with using a copy: the Steam client's shortcut only launches the original file, so you start your server by double-clicking your own script.
Ports 2456-2457 or crossplay: pick one
This is the only real decision in the whole setup. Either you run on the default Steam backend and forward ports, or you add -crossplay and let a relay handle the traffic.
Steam backend (no -crossplay) |
Crossplay backend (-crossplay) |
|
|---|---|---|
| Who can join | Steam players only | Players on any platform |
| Port forwarding | Required: UDP 2456-2457 by default, matching -port |
Not needed, traffic goes through a relay |
| Join by local IP | Works with -public 0 and Join IP |
Doesn't work (local and loopback addresses won't connect) |
| Ways to join | Server list, Join IP |
Server list, public IP and port, join code |
On the Steam backend, your router has to send incoming traffic to the PC running the server. Say that PC is 192.168.1.50 on your home network. You'd log in to your router, find the port forwarding page and forward UDP ports 2456-2457 to 192.168.1.50. If you change -port to something else, forward that number and the one after it instead. The script and the router have to agree.
With -crossplay, none of that is needed. The port number still matters in one case: if you run several servers behind the same public IP address, the port is what tells them apart.
The catch with crossplay is the local IP row in the table. If your roommate is on the same network and tries to connect to 192.168.1.50, it won't work on a crossplay server. They'd use the server list, the join code or your public address instead.
My pick for most groups is -crossplay. If you have a friend on console, or you just don't want to dig through router menus, it's the easier route and nobody gets left out. If everyone is on Steam and forwarding two ports doesn't bother you, the default backend does the job, and it's the one to use for a LAN-only server that people join by local IP.
How your friends join
How they get in depends on the choices you just made.
Public server. With -public 1, they open the server list in Join Game, search for "Frostheim" and enter the password.
Hidden server. With -public 0, they use the Join IP button. A friend across town types your public address, something like 203.0.113.25 in our example. Someone on your own network types the server PC's local address, 192.168.1.50, as long as you're on the Steam backend.
Crossplay join code. A crossplay server can also be joined with its public IP and port, but the join code is friendlier. Once someone is on the server, the code shows in the pause menu. A friend then:
- Opens
Join Game. - Presses
Add server. - Pastes the code.
Be aware that the code changes every time the server restarts. If you restart for an update, your friends need the new one, so it's worth having one person grab it and drop it in the group chat. For console players, Iron Gate's Crossplay FAQ covers their side of things: an Xbox joins like any other player, as long as crossplay is enabled on the console too.
Whichever way people connect, a server holds 10 players at most. That cap is unchanged in Valheim 1.0.
Updating after a patch without losing your settings
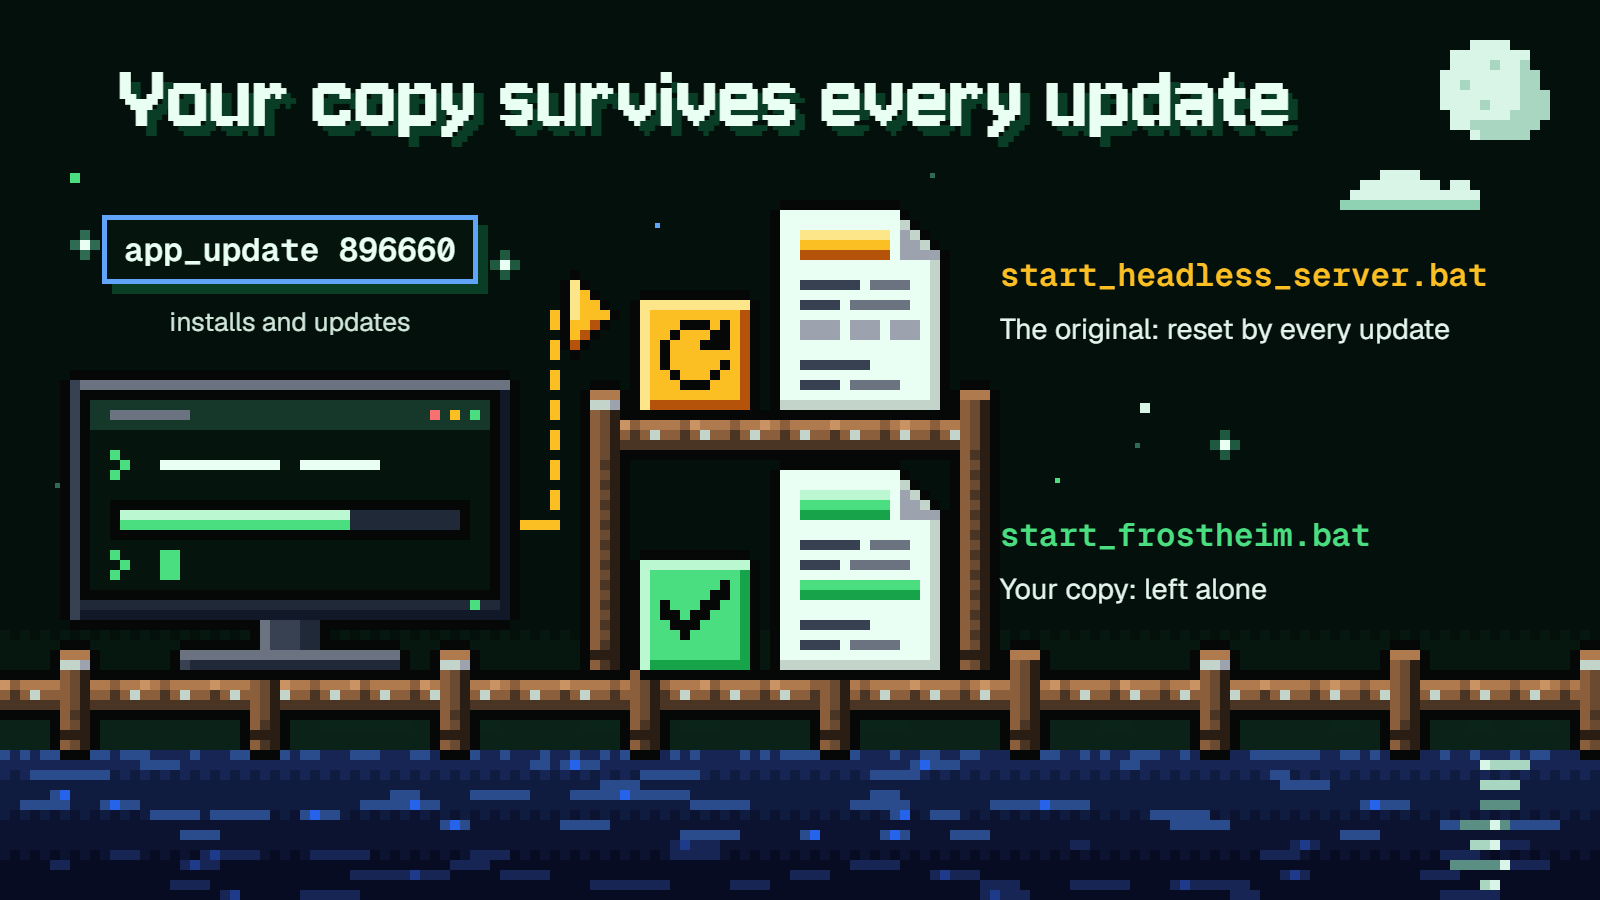
When Valheim gets a patch, the server needs the same one or your friends might not be able to connect. The good news is that there's no separate update command. app_update both installs and updates, so you stop the server and run it again:
force_install_dir C:\valheimserver
login anonymous
app_update 896660
quit
Or do it all in one line from a Command Prompt opened in C:\steamcmd, which is easy to save as its own little batch file:
steamcmd +force_install_dir C:\valheimserver +login anonymous +app_update 896660 +quit
Notice that validate is gone. On the first install it's useful, because it checks every file. On a routine update it's a liability: it overwrites any default file that has been changed, and that includes the original start_headless_server.bat if you edited it. Valve recommends validate only for the first install and for when the server is misbehaving.
This is where your copied script pays off. Because start_frostheim.bat isn't part of the default installation, neither an update nor validate touches it. Update, double-click your script, and Frostheim comes back with the same name, world and password.
Stopping the server and backing up your world
To stop the server, click its window and press CTRL+C. Don't close it with the X. That can leave the server running in the background, which is a headache when you then try to update or copy files.
Where your saves live
On Windows, everything is in:
%USERPROFILE%\AppData\LocalLow\IronGate\Valheim
Worlds are inside the worlds_local folder there. On Linux, the path is ~/.config/unity3d/IronGate/Valheim.
Automatic saves and backups
By default, the world saves every 30 minutes. The server also keeps 4 automatic backups: one that's 2 hours old and three that are 12 hours apart. So if something goes badly wrong in a Saturday night session, you can step back a couple of hours, or as far as about a day and a half.
Manual backups in 1.0
If you've hosted before, forget the old habit of copying a .db and .fwl pair. Since 1.0, each world is stored in its own folder, with the world data split into many chunk files, and a save only rewrites the chunks that changed. Backups get their own folders too.
For you, that means a manual backup is a folder copy. Stop the server and copy the whole Valheim save folder from the path above to another drive. Don't cherry-pick files out of it. It's worth doing before every update, since a dedicated server shuts down if its world is corrupt and you'll want something to fall back on.
Bringing in a world you already have
Set -world to the exact name of your existing world and the server loads it instead of creating a new one. The one requirement is that the server reads only local files. A world sitting in Steam Cloud is invisible to it, so the world has to be in the local save folder on the server PC first.
If that world is from before 1.0, the game makes a backup of it before converting it to the new format the first time it loads. Iron Gate's Valheim 1.0 FAQ confirms that old saves stay where you left them and that you can keep playing on them.
The permission files
In the same save folder, you'll find adminlist.txt, bannedlist.txt and permittedlist.txt. The first two do what you'd expect. Be careful with the third: the moment you add anyone to permittedlist.txt, everyone who isn't on it is locked out. If you use it, put your whole group in.
FAQ
Is the Valheim dedicated server free, and do I need to own the game on the hosting PC?
It's free. SteamCMD downloads it with an anonymous login, so the hosting PC doesn't need a Steam account that owns Valheim. You'll need the game itself on whatever machine you play from.
Can console players join my PC server?
Yes, if you start the server with -crossplay. Without it, the server runs on the Steam backend and only Steam players can see and join it.
How many players can join?
Up to 10 at a time. That's the same in Valheim 1.0 as before.
Why did my server settings reset after an update?
You most likely edited the original start_headless_server.bat, which is reset whenever the server updates. Running validate overwrites it as well. Put your settings in a copy with its own file name and start the server from that.
Can I use my existing world?
Yes. Make sure the world is in the local save folder on the server PC, not only in Steam Cloud, and set -world to its exact name. A pre-1.0 world is backed up automatically before it's converted.